CLICK HERE FOR FREE BLOGGER TEMPLATES, LINK BUTTONS AND MORE! »
Showing posts with label flower. Show all posts

Friday, April 25, 2014

Sending you..... Happy Thoughts

Hello crafty bloggers, yes its been awhile since I've posted.
 Finally! I'm back in the groove and will start posting
 weekly again for A Jillian Vance Designs.
 Yay ! I'm excited to start creating again with
AJVD's amazing new stamp and dies.
 
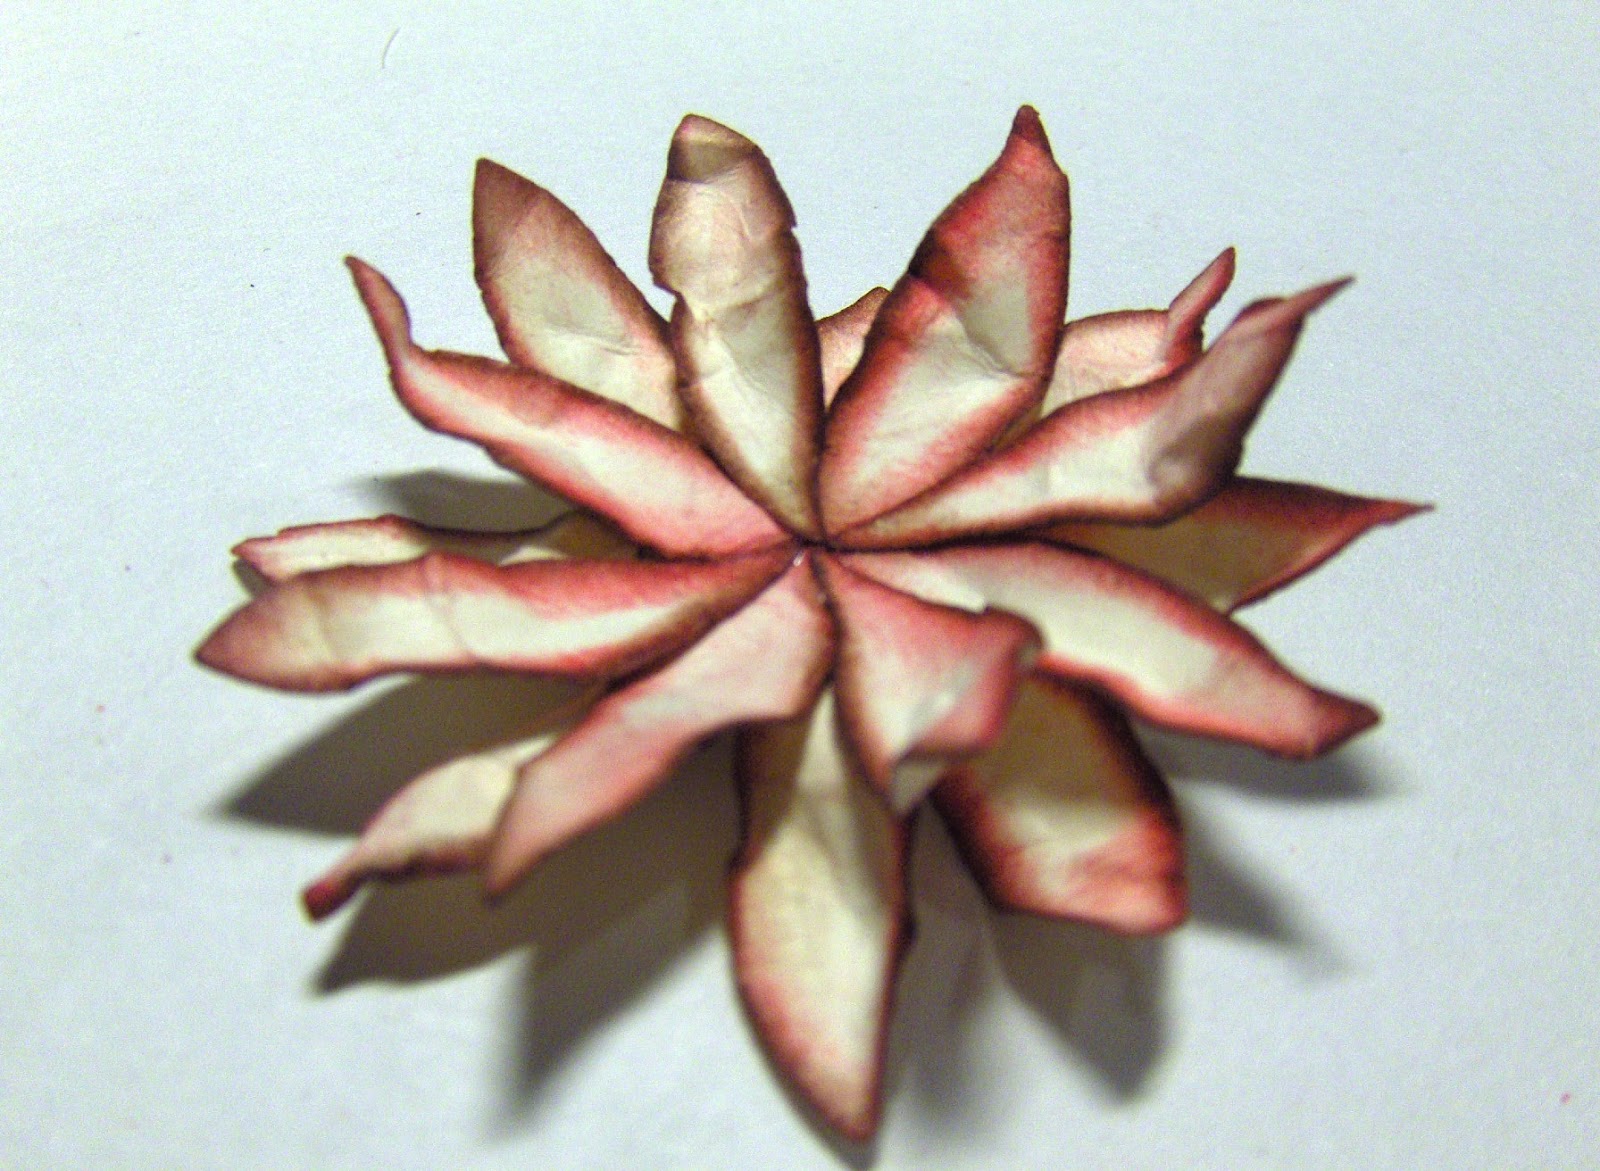
Today I created this circle card using AJVD
Product:

 
In the center of the flower I used Imaginisce i-Rock
 
I love the Dresden Plate Quilt Block Die it's great to use
with all those we all have. I love how this 3D flower
turned out.  The background paper is from
My Mind's Eye " In Bloom" paper pad.


Thank You so much for stopping by my blog, please leave a comment. I would love if you become a follower and subscribe to my blog, great projects and inspiration added frequently.


Monday, August 19, 2013

Have a Happy Day Teacher

Hello crafty bloggers this week with
the DT will posting teacher treat inspiration.
I created a treat bag using the
&


Thank You so much for stopping by my blog, please leave a comment. I would love if you become a follower and subscribe to my blog, great projects and inspiration added frequently.
 
Mini Bag Die by Zig & Me Originals


3D{ie} Bow Die Set 

 Black Pear Pins
 

Monday, February 25, 2013

Happy Birthday Bunny!!! :)

Hello crafty bloggers, today we have a special AJVD birthday.
Today is Bunny's birthday  (Jillian's Mom)
The AJVD design came together and created some
great Birthday card for Bunny. Stop by
 all the great cards from the design team.

HAPPY BIRTHDAY BUNNY

To create my card I used some great stampy goodies from


To create this flower I used the spellbinder
shapeabilites  "flower creations three"


Materials
Paper from Prima Stationery
"Madeline" 6x6 paper stack
Tim Holts "black soot" distress ink
K&Company Adhesive Borders
Martha Stewart gold embossing powder
Adhesive perals from Joann's
Recollections Lace on a roll

Thank You so much for stopping by my blog, please leave a comment. I would love if you become a follower and subscribe to my blog, great projects and inspiration added frequently.


Wednesday, February 6, 2013

Thinking Of You Card


Hello crafty bloggers!! :)
I'm joining another challenge this week.
I created this card for the
The challenge this week is the follow the sketch below


Materials:

Paper: My Mind's Eye "Home Sweet Home"
Pink Background Paper: DCWV "The Lace & Linen" Stack
Sentiment: Fiskar "All Year Greetings"
Flower made from: Spellbinder "Spiral Blossom Three"
Ink: Whisper Archival Black
Ranger Liquid Pearls "Platinum"


Thank You so much for stopping by my blog, please leave a comment. I would love if you become a follower and subscribe to my blog, great projects and inspiration added frequently.


Monday, November 19, 2012

Christmas Gift box & card


Hello crafty friends this week at
the design team will be featuring


I created an A2 size card using paper from My Minds Eye
"Sweet Dreams Holiday Avenue" stack

The stripped paper is in the background banner is

I also created a gift box recycling a food can.

The poinsettia I created with the leaf in the


Thank You so much for stopping by my blog, please leave a comment. I would love if you become a follower and subscribe to my blog, great projects and inspiration added frequently.


Saturday, October 6, 2012

World Cardmaking Day :)

Today is World Cardmaking Day! For today I created an A2 size card using A Jillian Vance Design  products. The AJVD products I used is {die}velop Foto Frames & {die}alogue Bubbles Die Set , Over the Hill Stamp Set  , {die}namic Duo Die Set   and Emerald Cut {die}mond Nesting Die Set .


The paper is from My Minds Eye "Lost & Found" 6x6 paper pad.
The Image is from Cricut Cartridge "Forever Young" and cut out a 3inches.

Here I created this grungy flower using the flower petal inculded in the


Sentiment from Over the Hill Stamp Set  and stamped on the {die}namic Duo Die Set  .
I added dots of Liquid Perals "Butter Cup" from Ranger.

Below are instructions on how I created the Grungy Flower using
the flower petal inculded in the

First I cut out 15 petals

 Inked each petal with Distress Ink "festive berries"

and then inked them again with "walnut stain"

Now to make the flower grungy I just crumpled all the petals.
This will give each petal some dimension.


I used an 1/2 inch cricle punch and started to glue each petal
around the circle and attaching them in the center.


This is two layers of petals

here I added the last layer of petals behind the flower and in between
each peatal to give it a fuller look.

 all layers completed

Now I just added a pearl in the center.
Grungy flower complete :)

Thank you for joining A Jillian Vance Design for World Cardmaking Day!!!
Check out the other AJVD Design Team members blogs today!


Thank You so much for stopping by my blog, please leave a comment. I would love if you become a follower and subscribe to my blog, great projects and inspiration added frequently.

Monday, March 26, 2012

Flower Power

This week at A Jillian Vance Design the DT member will be posting projects with a flower theme.  The stamp set I will be featuring is Flower Power stamp set.


All paper is from DCWV "Lemon Flower" stack.
I added Glossy Accents to the green background paper on some of the dots.  I love how it gives it a clear bubble dimension.
The sentiment can be found on the Flower Power stamp set from  A Jillian Vance Design.


This beautiful flower was created with A Jillian Vance Design new dies.  The leave comes in the 

{die}vine Cross Combo Die Set.  


Thank You very much for stopping by my blog.  I would love if you become a follower and leave a comment.  :)

Monday, March 19, 2012

Day 1 - Sneak Peak Charming Occasions

Hello and welcome to day 1 of A Jillian Vance Design sneak peek week.  


I created an A2 size card, sewed around the card base with brown thread.  The flower cut is from
Spellbinders Bloom Three set.

This stem sentiment is from A Jillian Vance Design 


The background of my flower is stamped with a new A Jillian Vance Design stamp set. 


Be sure and visit all the design team members for great ideas and Sneak Peeks!

Nadia ~ Nadia's Beautiful Mess
Elisa ~ Perpetual Stew
Jennifer ~ Scrapping Under the Influence 
Jillian ~ Princess and the Paper

*** HOW TO WIN A AJVD STAMP SET OF YOUR CHOICE ***
all you need to do is become a follower of A Jillian Vance Design and leave a comment everyday.


Thank you so much for stopping by my blog. 
Please leave a comment.

Monday, March 21, 2011

Duct Tape Flower Card

This is a A2 size card.  The black flower is made from duct tape and it's also a hair barrette, it can be removed from the card easily.  I thought this would be  very cool Birthday card.

Step by Step instructions for duct tape flower.
1 - Cut off 8 2" pieces of duct tape and 4 1" pieces of duct tape.

2 - First start off with 4 2" pieces. Fold one corner over

3 - Then fold the other side to create a triangle.  Do this to all 4 pieces.


4 - Now stick all four pieces together to create a square.


5 - Now start with the remaining 4 2" pieces and fold them over to create a triangle again


6 - Now place the 2" triangles around the square, by pinching the center to create a ruffles.


7 - Now with the 1" pieces create triangles and place them on top


8 - Cut a round piece of duct tape and place in the center of the flower, also add one the back of the flower


9 - Add a rhine stone in the center and glue a barrette on the back and your flower is complete

On the front of the card I  punched two holes so I can insert the barrette


Phewww! now that was a long step by step instructions.
I hope I was able to explain how to create this duct tape flower well.  Please feel free to contact me with any questions. Thank you for stopping by and please leave a comment.